


Proxy List Connector
A Proxy List is a specific type of connector designed to manage a manual list of proxies. Users have the flexibility to either utilize their own private proxies or incorporate a list of public proxies available on the Internet.
ProxyHerd supports HTTP/HTTPS proxies and SOCKS4/SOCKS5 proxies.
Check out this video from ProxyScrape:
Or this video from Proxy-Sale:
For instance, public proxies can be obtained from:
- ProxyScrape
- Spys One
- IPRoyal
- Free Proxy CZ
- Free Proxy World
- Proxy List Download
- Scraping Ant
- ProxyDB.net
- ...
Open a discussion if you would like to contribute and add your proxy list.
WARNING
Please note that using this connector with Pay-Per-GB subscriptions without proper configuration can lead to substantial costs.
Paid proxy lists (Webshare and others)
The connector is called Proxy List (and Free Proxies in a few field names) because of how the proxies are supplied, as a list, not because of their price. Any provider that hands you a list of ip:port or ip:port:username:password entries works with it, including paid plans from providers without a dedicated connector yet, such as Webshare.
With Webshare:
- In the Webshare dashboard, open Proxy list, choose the download format
ip:port:username:passwordand copy the download link. It is a stable URL onproxy.webshare.iothat always returns your current list. - In ProxyHerd, create a
Proxy Listcredential, which is only a holder (Step 1), then aProxy Listconnector with the number of proxies you want to use (Step 2). - On the connector, click
Updateand add the download link as a source with a daily refresh,86400000ms (Step 3). ProxyHerd fetches the list on that schedule, so rotated or replaced proxies arrive on their own. Pasting the list in the textarea works too (Step 4); the accepted line formats are listed there. - Leave
Freeproxies Kickdisabled, or set it to a generous value. Paid proxies are stable, and a kicked proxy leaves the pool until the next fetch of the list. - Start the connector (Step 5). The proxies appear online once they have fetched the fingerprint service.
Other providers work the same way, as long as their list is reachable at a URL or can be pasted. The warning above about pay-per-GB plans still applies: every health check goes through the proxies, see Sizing and proxy traffic.
ProxyHerd
Open ProxyHerd User Interface and select Marketplace:
Step 1: Create a new credential
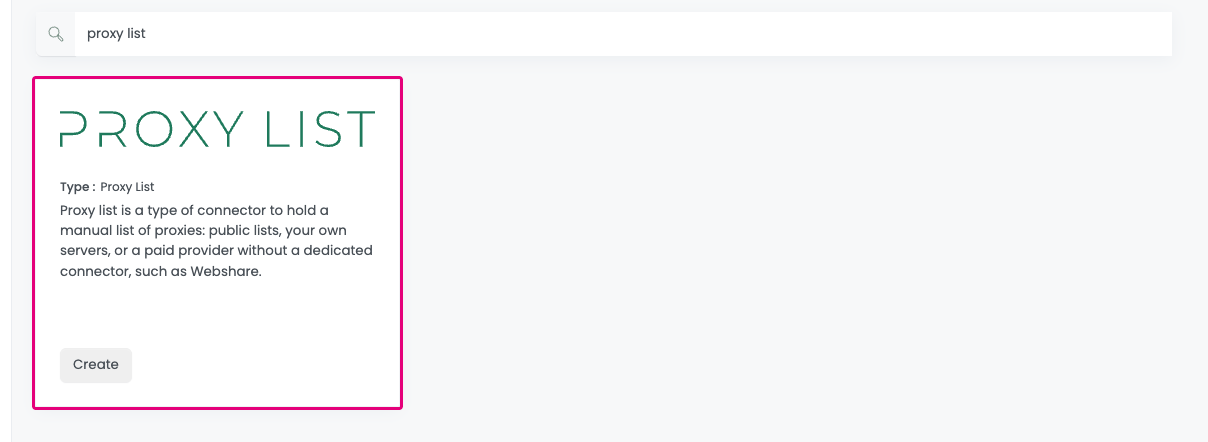
Select Proxy List to create a new credential (use search if necessary).
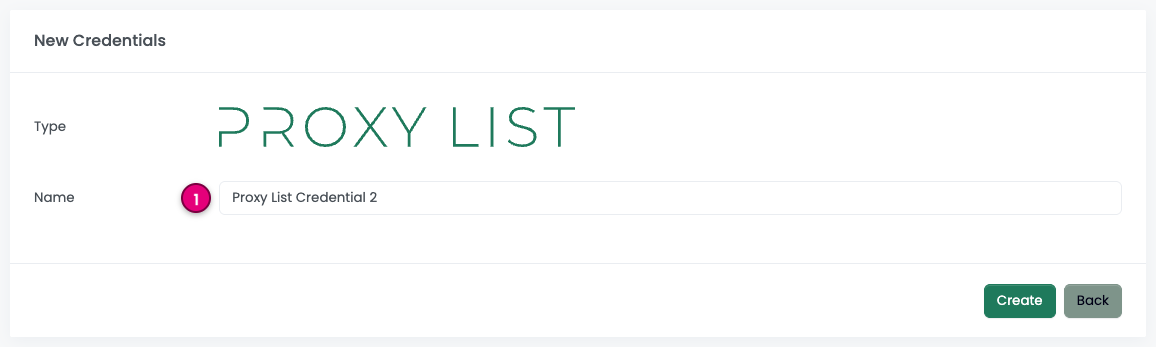
Complete the form with the following information:
- Name: The name of the credential
And click on Create.
INFO
This credential is a holder for the proxy list connector because ProxyHerd always needs a credential to create a connector.
Step 2: Create a new connector
Create a new connector and select Proxy List as provider:
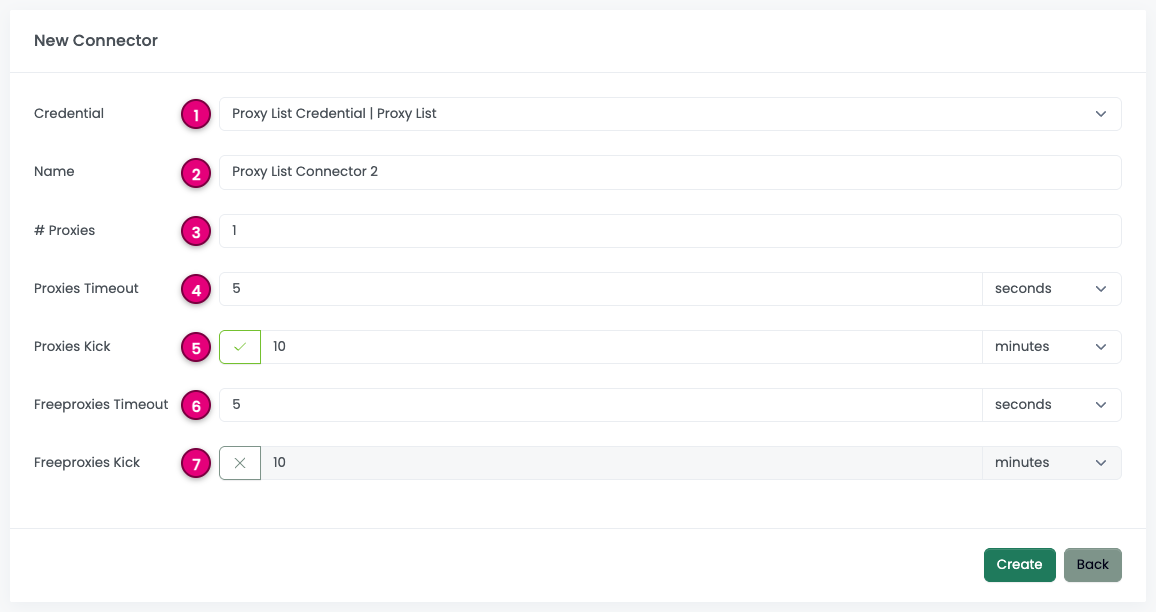
Complete the form with the following information:
- Credential: The previous credential;
- Name: The name of the connector;
- # Proxies: The number of instances to create;
- Proxies Timeout: Maximum duration for connecting to a proxy before considering it as offline;
- Proxies Kick: If enabled, maximum duration for a proxy to be offline before being removed from the pool;
- Freeproxies Timeout: Same as
Proxies Timeoutbut for the freeproxies pool; - Freeproxies Kick: Same as
Proxies Kickbut for the freeproxies pool.
INFO
Adjust Freeproxies Timeout to a higher value to avoid removing proxies from the freeproxies pool too quickly.
Step 3: Add a proxies source
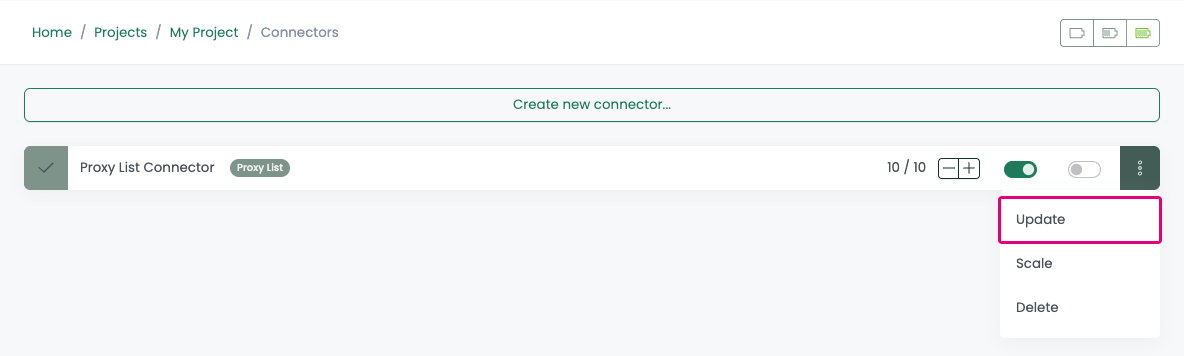
On the connector, click on Update.
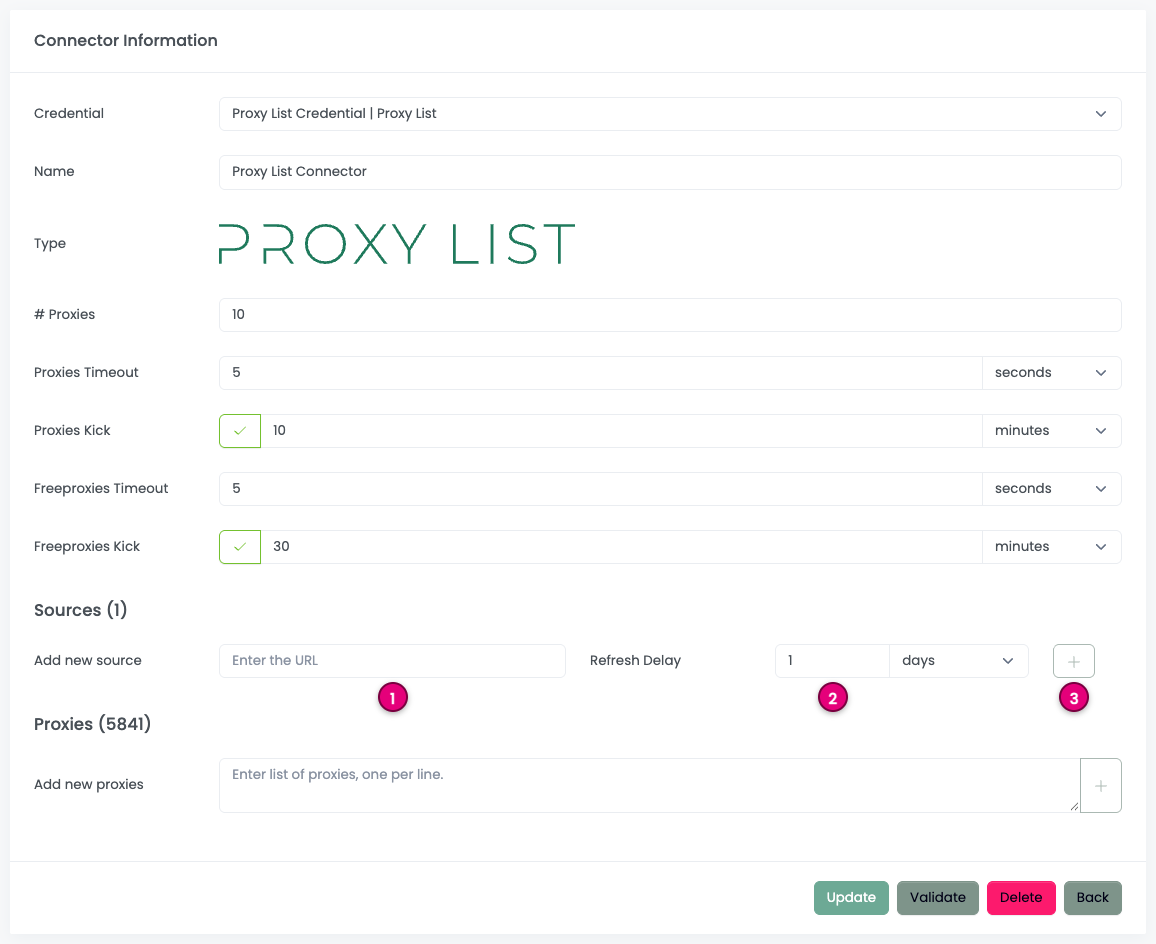
- Fill the URL of the proxy list;
- Choose the refresh rate;
- Click on
Add.
Here is a good URL example from ProxyScrape. The URL must return a list of proxies, one per line. ProxyHerd will automatically fetch the list of proxies from the URL and update the connector.
INFO
It is recommended to activate Freeproxies Kick to curate offline proxies from the freeproxies pool. Proxies will be added again when ProxyHerd fetches the list from the URL.
Step 4: Add manually some proxies
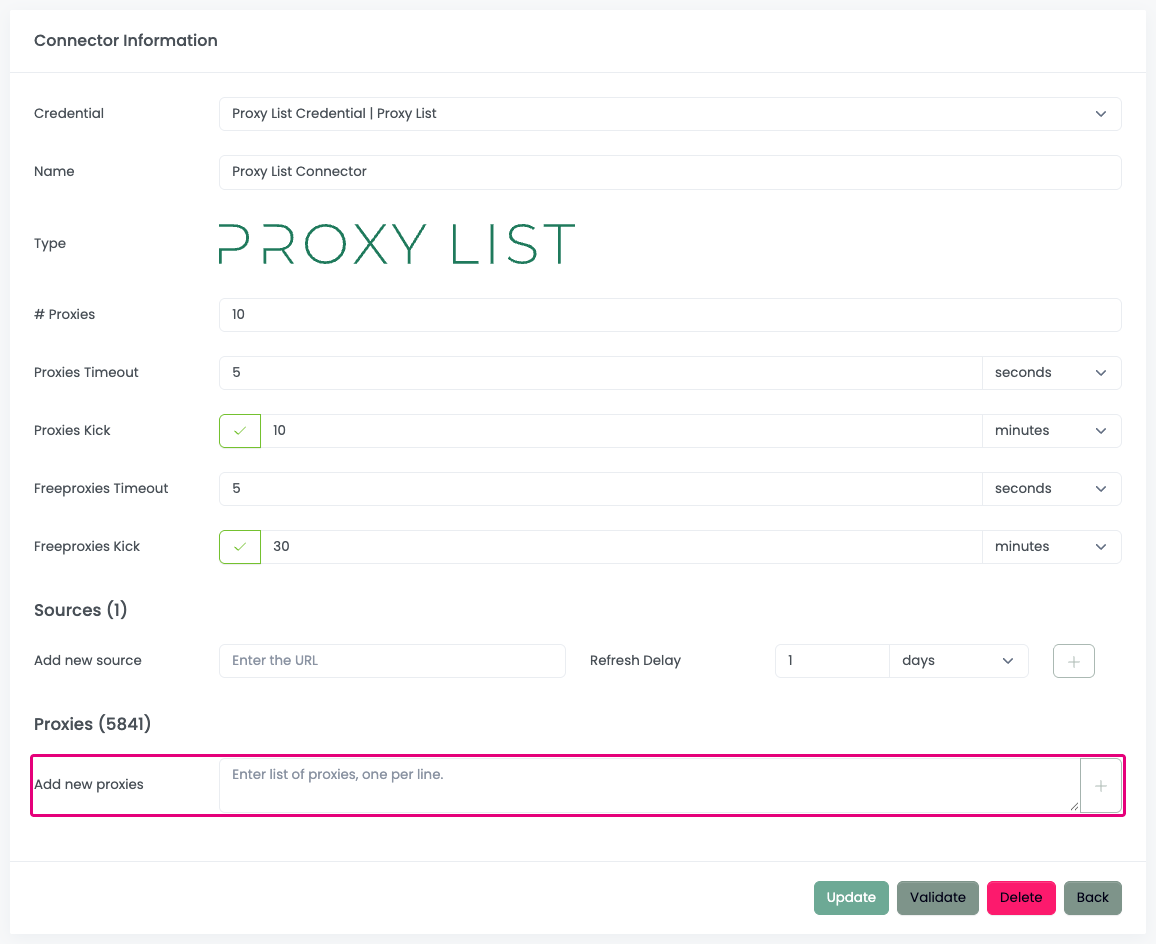
Copy / Paste a list of proxies in the textarea.
ProxyHerd supports theses formats:
ip:portip:port:username:passwordhttp://ip:porthttp://username:password@ip:porthttps://ip:porthttps://username:password@ip:portsocks://ip:port(shortcut forsocks5://ip:port)socks://username:password@ip:port(shortcut forsocks5://username:password@ip:port)socks4://ip:portsocks4://username:password@ip:portsocks5://ip:portsocks5://username:password@ip:port
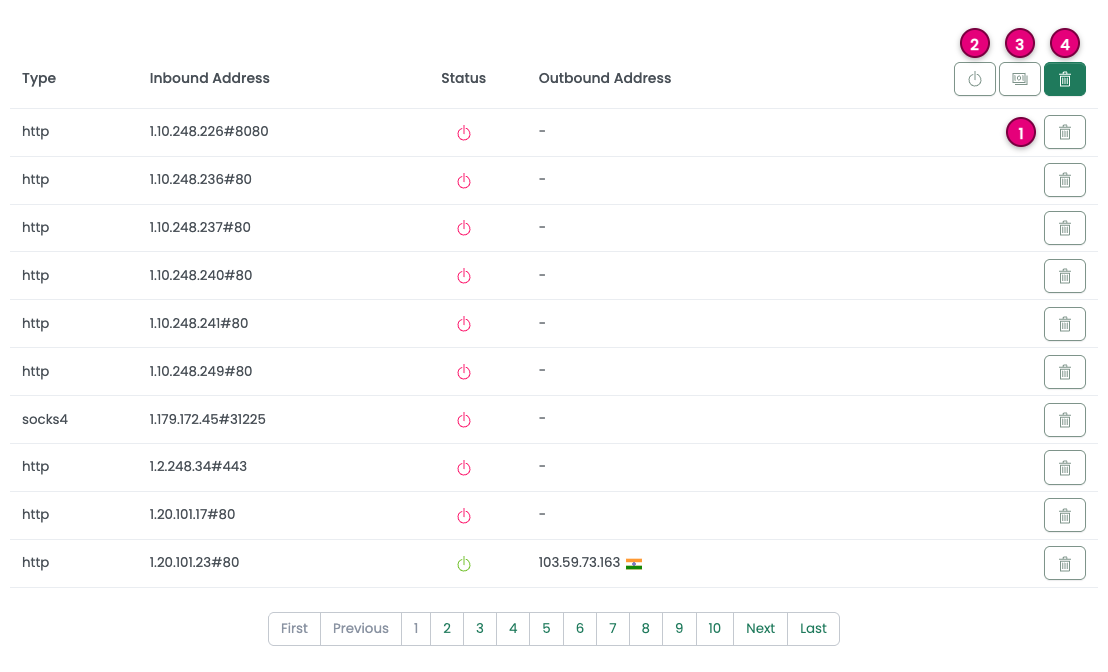
ProxyHerd will assess the availability of proxies and retain only those that are currently accessible for the connector.
The provided buttons offer the following functionalities:
- Delete One Proxy: Remove a specific proxy from the list;
- Delete Offline Proxies: Eliminate proxies that are either offline or in a waiting state for fingerprinting;
- Delete Duplicates: Remove proxies that share the same outbound IP address;
- Delete All Proxies: Clear the entire proxy list.
Step 5: Start the connector
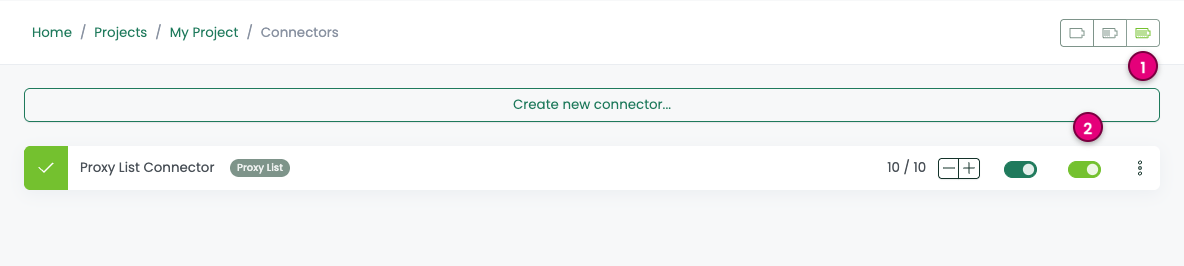
- Start the project;
- Start the connector.
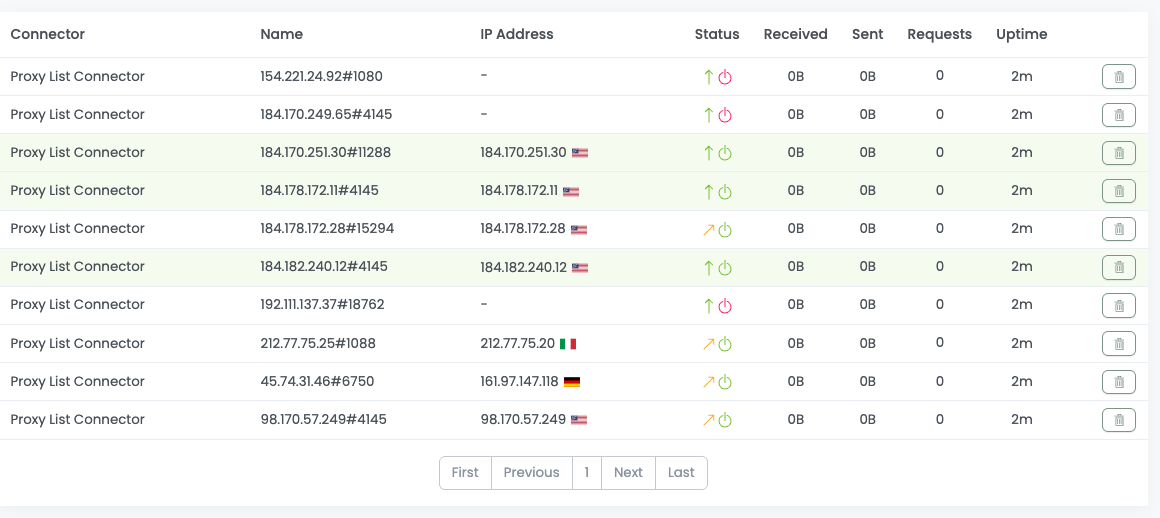
You can use the proxies on the connector.
Other: Stop the connector
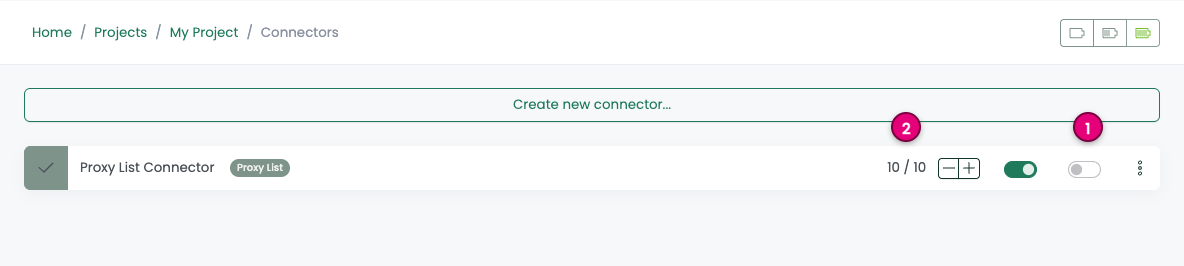
- Stop the connector;
- Wait for proxies to be removed.