


Requests Integration

This tutorial uses the famous Python HTTP library Requests.
Step 1: Install the library
shell
pip install requestsStep 2: Retrieve CA certificate and project credentials
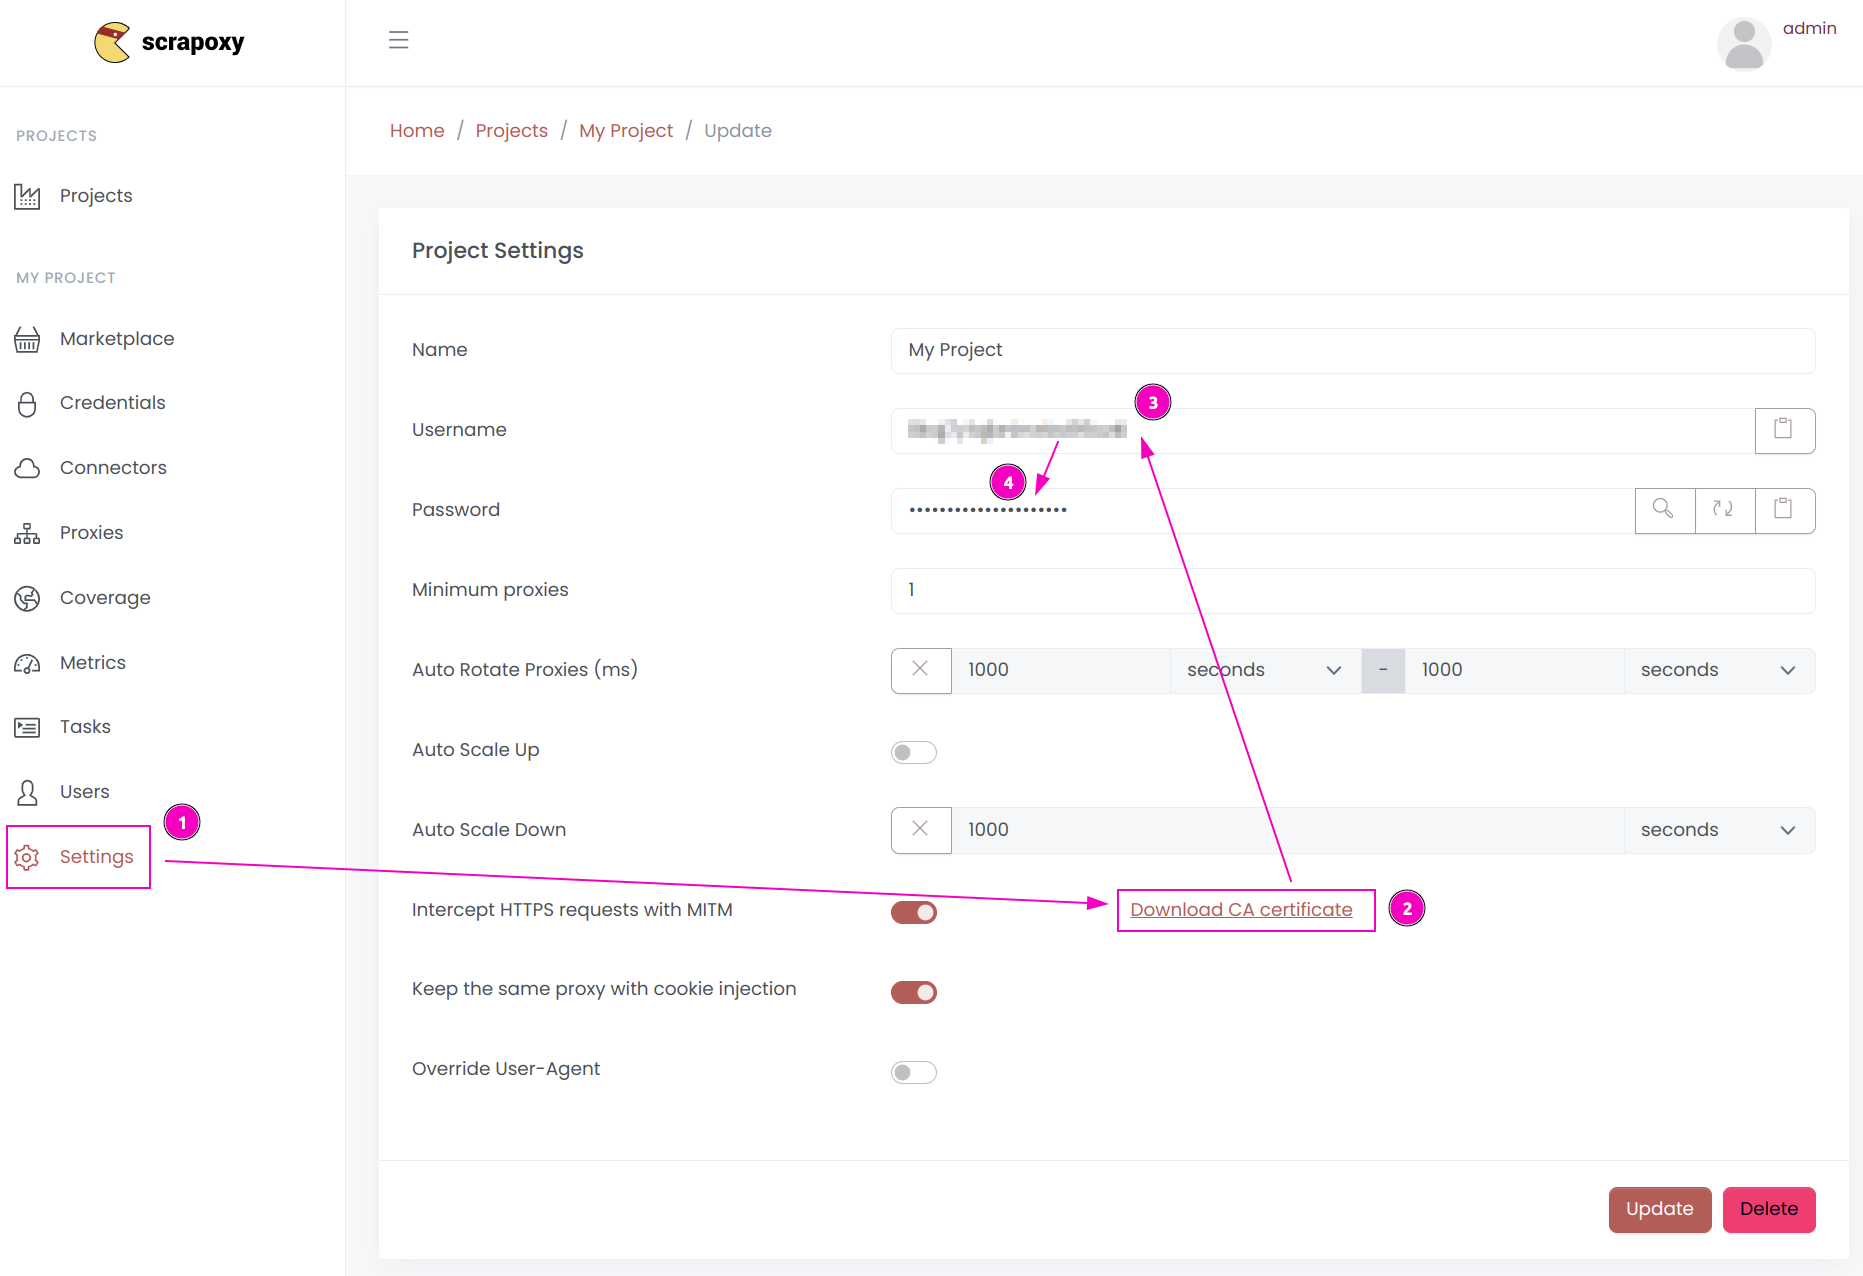
- Open ProxyHerd User interface, and go to the project
Settings; - Click on
Download CA certificateand save the file; - Remember the project's
Username; - Remember the project's
Password.
INFO
It is assumed that file is saved in /tmp/proxyherd-ca.crt.
Step 3: Create and run the script
Create a file name requests.py with the following content:
python
import requests

ca = "/tmp/proxyherd-ca.crt"
proxy = "http://USERNAME:PASSWORD@localhost:8888"

r = requests.get(
    "https://api.ipify.org?format=json",
    proxies={"http": proxy, "https": proxy},
    verify=ca
)

print("proxy instance:", r.headers["x-scrapoxy-proxyname"])

print(r.json())
Replace USERNAME and PASSWORD by the credentials you copied earlier.
ProxyHerd includes a x-scrapoxy-proxyname header in each response, indicating the name of the proxy instance assigned for the request.
Run the script:
shell
python requests.pyStep 4: Sticky session (optional)
To reuse the same proxy instance for all requests, add the following line:
python
import requests

ca = "/tmp/proxyherd-ca.crt"
proxy = "http://USERNAME:PASSWORD@localhost:8888"
headers={
    'X-Scrapoxy-Proxyname': 'PROXYNAME'
}

r = requests.get(
    "https://api.ipify.org?format=json",
    headers=headers,
    proxies={"http": proxy, "https": proxy},
    verify=ca
)

print("proxy instance:", r.headers["x-scrapoxy-proxyname"])
Replace PROXYNAME by the proxy instance name you want to use.