


Rayobyte Connector

Rayobyte is an US platform that provides diverse and rotating residential, datacenter, and mobile proxies.
Prerequisites
An active Rayobyte subscription is required.
Rayobyte Dashboard
Connect to Dashboard.
Get the credentials
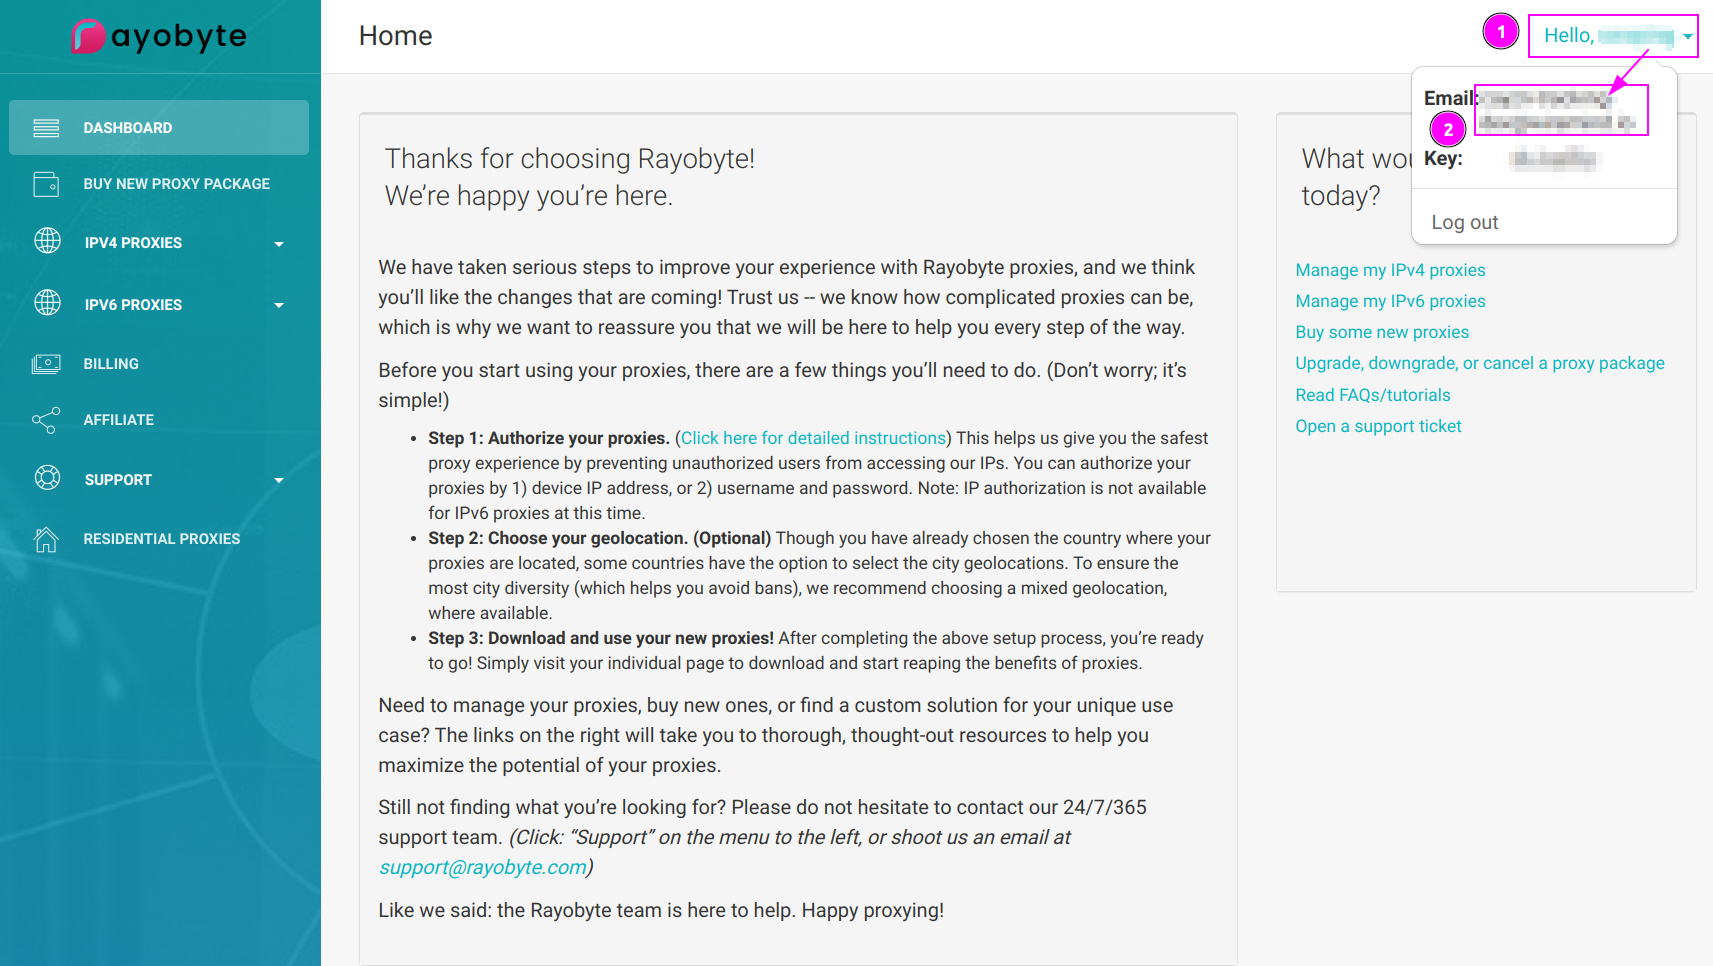
- Click on your name on the top right;
- Remember the
Email.
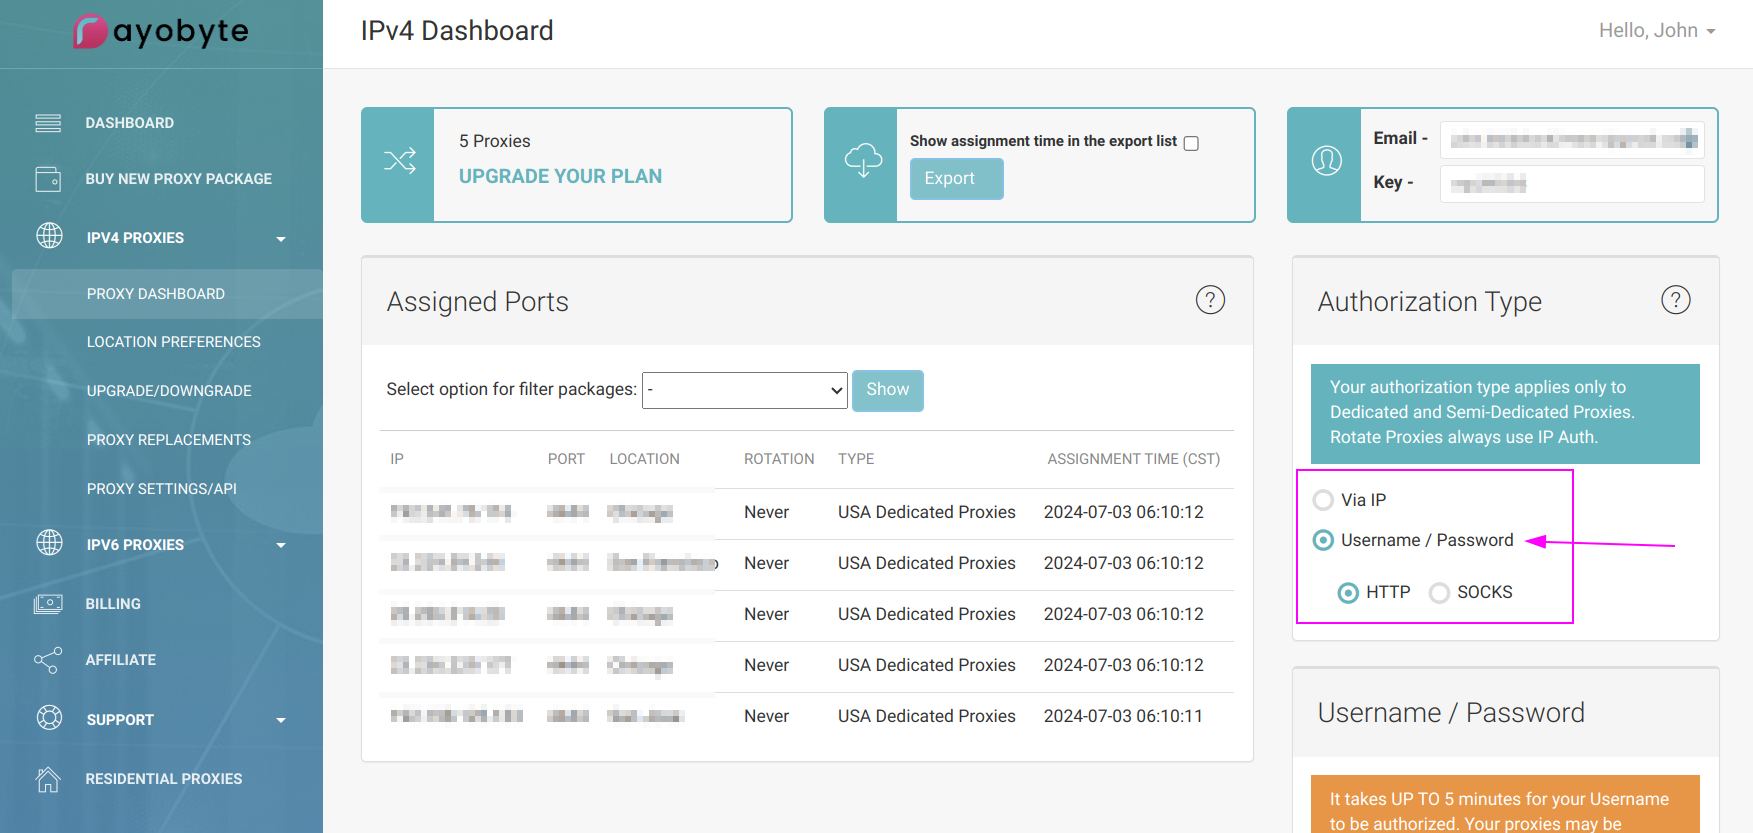
Choose 'Username / Password' as Authorization Type.
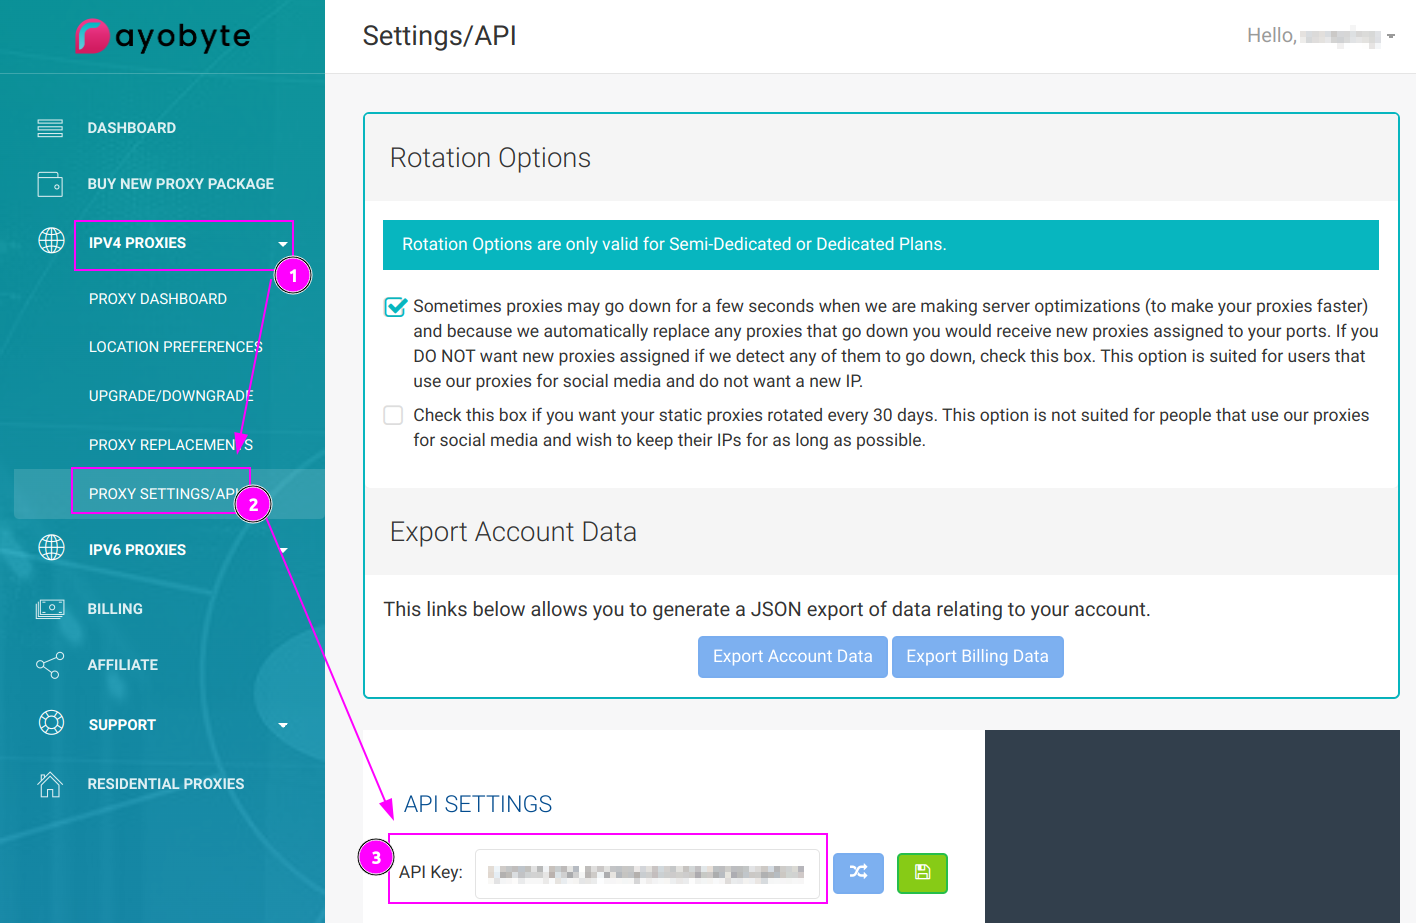
- Click on
IPV4 PROXIES; - Select
PROXY SETTINGS/API; - Remember the
API Key.
ProxyHerd
Open ProxyHerd User Interface and select Marketplace:
Step 1: Create a new credential
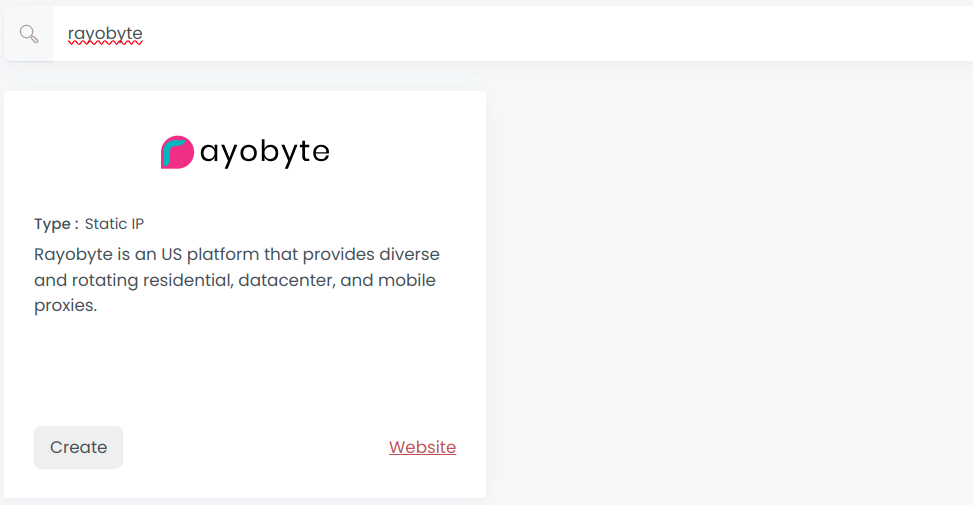
Select Rayobyte to create a new credential (use search if necessary).
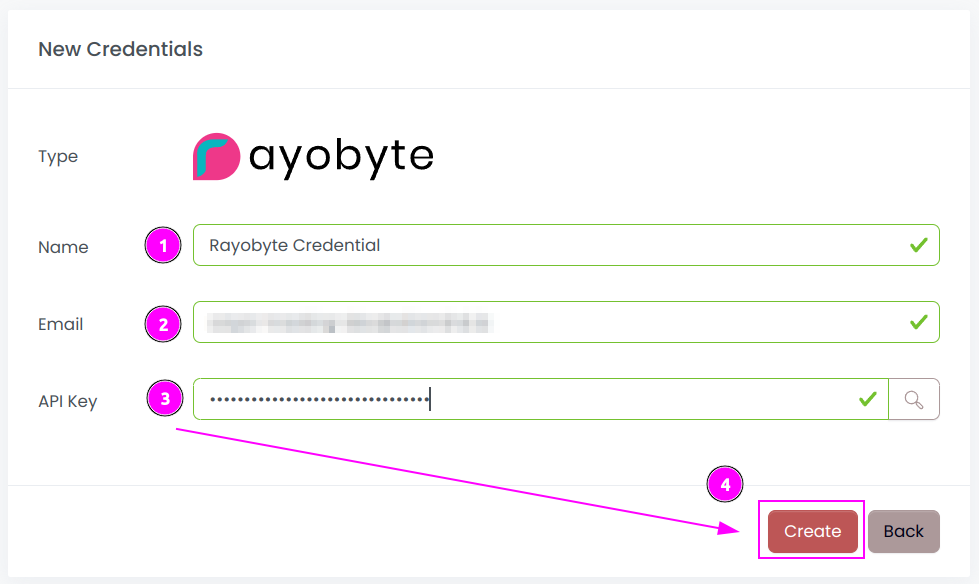
Complete the form with the following information:
- Name: The name of the credential;
- Email: The email of the account;
- API Key: The key of the API.
And click on Create.
Step 2: Create a new connector
Create a new connector and select Rayobyte as provider:
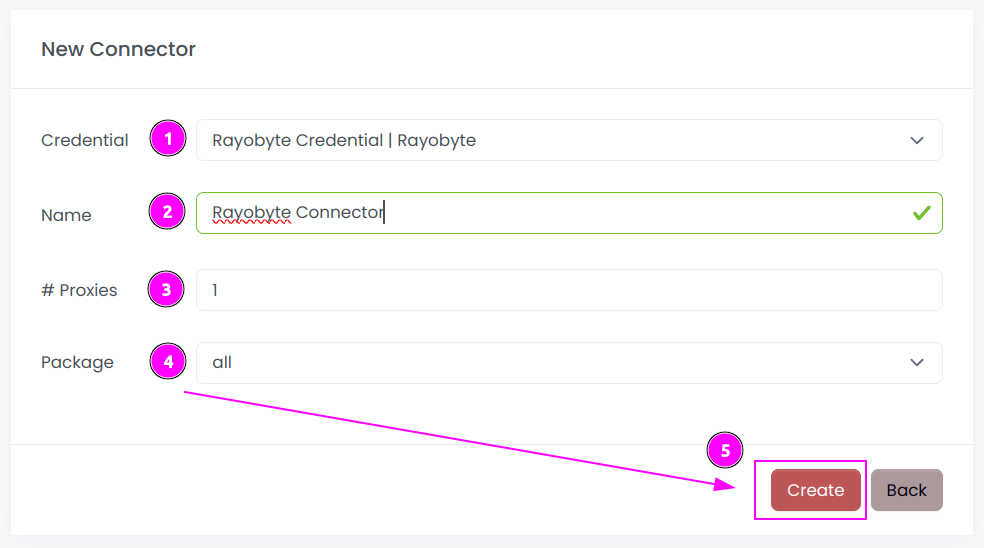
Complete the form with the following information:
- Credential: The previous credential;
- Name: The name of the connector;
- # Proxies: The number of instances to create;
- Package: Select the package that you bought, or
Allto use all packages.
And click on Create.
Step 3: Start the connector
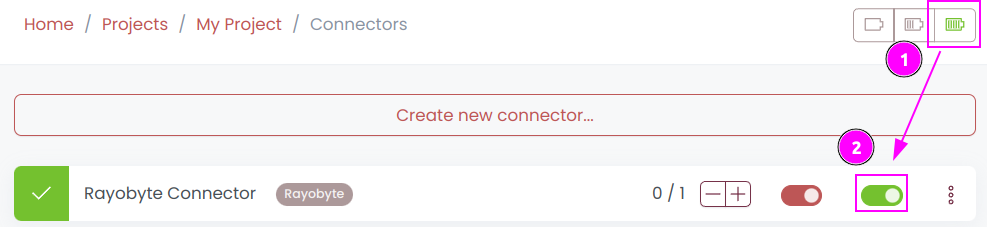
- Start the project;
- Start the connector.
INFO
If the proxies were just ordered, it may take between 5 and 10 minutes to be available.
Step 4: Interact with proxies

Within this connector, you can perform 2 actions on the proxies:
- Trash button: Initiates a proxy rotation. The session is temporarily removed and will be reused later.
- Cross button: Requests a replacement from Rayobyte to permanently replace the IP. It's important to note that there is a limited count of monthly replacements available.
Other: Stop the connector

- Stop the connector;
- Wait for proxies to be removed.